Dusty vents, musty smells, rising power bills—signs your home’s comfort engine needs attention. A quick clean of the AC indoor unit is one of the highest-impact DIY jobs for stronger cooling, lower energy use, and cleaner air. In this guide, you’ll learn safe, step-by-step methods to clean the indoor unit like a pro using simple tools and straightforward techniques. If you’ve wondered, “Is it safe to clean my AC indoor unit myself?” or “How do I clean the evaporator coil and drain line without breaking anything?”—you’re in the right place.
Why Dirty Indoor Units Cause Big Problems (And How Cleaning Fixes Them)
The trouble often hides in plain sight: dust, lint, and biofilm slowly collect on the filter, evaporator coil, blower wheel, and drain pan. That buildup works like a blanket on the coil, choking airflow and blocking heat transfer. You get longer run times, uneven cooling, funky odors, and, when the drain clogs, leaks. The U.S. Department of Energy notes that replacing a clogged filter alone can cut AC energy use by 5–15%. A dirty evaporator coil drags efficiency and capacity down even further, so the system works harder and you feel less comfortable.
Air quality deserves equal attention. Moisture condensing on a warm coil can become a breeding spot for microbial growth. If the drain pan or line slows, stagnant water adds to musty smells and circulates particles you don’t want to breathe—especially for anyone with asthma or allergies. A thorough cleaning breaks that cycle. Airflow is restored, strain on the compressor and fan motor drops, and the air stays cleaner. You also trim the risk of icing (a too-cold coil from restricted airflow) and water damage from an overflowing pan.
Money matters, too. A short DIY session can head off service calls and steady your utility bills during peak season. In practice, most homeowners notice fewer temperature swings, quieter operation, and faster cool-downs after a proper clean. If you have pets, live near a busy road, or run the system for long hours, cleaning becomes essential—filters load faster and coils accumulate grime sooner.
Here’s a quick reference showing common symptoms, probable causes inside the indoor unit, and simple DIY fixes you can apply today.
| Symptom | Likely Cause | DIY Fix | Time Needed |
|---|---|---|---|
| Weak airflow | Clogged filter or dirty coil | Wash/replace filter; brush and clean coil | 30–60 minutes |
| Musty smell | Wet drain pan/biofilm buildup | Clean pan and drain line; add mild sanitizer | 30–45 minutes |
| Water dripping | Clogged drain line | Vacuum or flush drain line; ensure pan slope | 20–30 minutes |
| Ice on pipes/coil | Restricted airflow from dirt | Turn off AC to thaw; clean filter/coil; restart | Thaw + 60 minutes |
Bottom line: routine cleaning tackles the root cause of performance drops. Expect cooler air, cleaner air, and lower bills—results you can safely achieve with a plan.
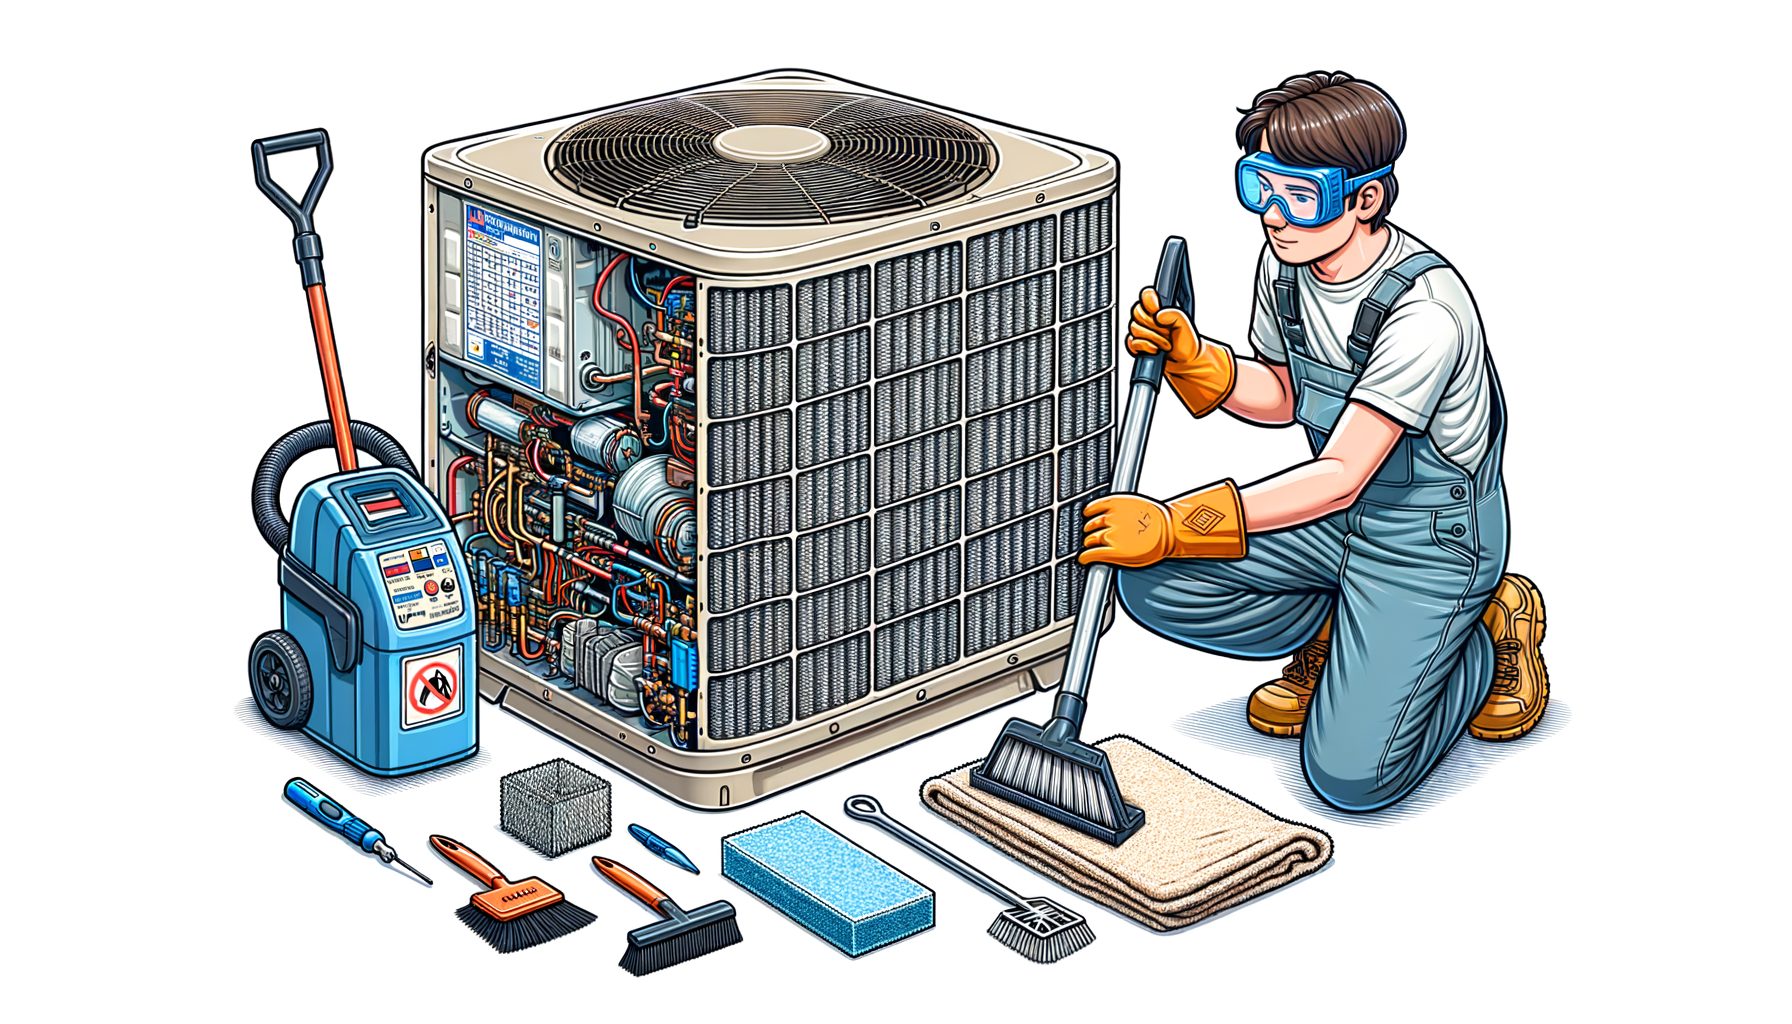
Safety First and Tools You Actually Need
Safety first—make the system safe before touching anything. Switch the AC off at the thermostat and cut power at the breaker or isolator. Doing so prevents the indoor fan from starting while you work and shields the control board from moisture. Wear safety glasses, gloves, and a snug-fitting dust mask or respirator; fine debris can release when coils and blower wheels are brushed. Lay a towel or drop cloth under the unit to catch drips and protect floors. For wall-mounted splits, a disposable cleaning bag or taped plastic sheet under the unit helps contain foam and rinse water. Always check the manufacturer’s manual so you don’t void a warranty or remove parts that require a pro.
Keep chemicals gentle. Use a non-acid, non-caustic foaming coil cleaner rated safe for aluminum and copper on evaporator coils. Prefer low-toxicity? Try mild detergent in warm water with a soft brush. Avoid bleach on coils—it can corrode metals and damage drain pans. For drain lines, white vinegar or a manufacturer-approved cleaner works well. Never mix chemicals. Keep sprays controlled and away from circuit boards and sensors. If your unit’s electronics sit behind an accessible cover, keep them dry and avoid pressure spraying anywhere near the board.
Below is a compact tool list that covers most indoor units without expensive gear:
| Tool/Item | Purpose | Approx. Cost |
|---|---|---|
| Soft brush + microfiber cloths | Dusting fins, wiping plastic surfaces | Low |
| Vacuum with soft brush attachment | Removing loose dust from coil and blower | Low–Medium |
| Non-acid foaming coil cleaner | Breaking down grime on evaporator | Low–Medium |
| Spray bottle or pump sprayer | Applying rinse water/detergent | Low |
| Wet/dry vacuum (optional) | Clearing the condensate drain line | Medium |
| Fin comb (optional) | Straightening bent coil fins | Low |
| Cleaning bag or plastic sheeting | Catching drips under wall units | Low |
Pro tip: check your filter size and type (washable mesh on many splits; disposable pleated on some fan coils). If your unit uses disposable filters, match the manufacturer’s recommended rating—overly high resistance can choke airflow. With the right safety steps and a few tools, risk is minimized and the process stays smooth end to end.
Step-by-Step: How to Clean Your AC Indoor Unit Without Damage
Use the following method for most wall-mounted split ACs and many fan coil units. Always adapt to your model’s instructions.
1) Power down. Turn the AC off at the thermostat and breaker. Confirm the fan doesn’t start when you open the front cover.
2) Prep the area. Place a towel or cleaning bag under the unit. Put on gloves, glasses, and mask. Keep a small bucket or trash bag nearby for dirty water and debris.
3) Remove and clean the filters. Lift the front panel, slide out the mesh filters, and vacuum both sides. Wash gently with warm water and a small amount of mild detergent. Rinse and let them air-dry completely. Never reinstall damp filters; moisture encourages odor.
4) Dust the coil and blower. With filters out, you can see the evaporator coil (the cold finned surface). Use a soft brush and vacuum to remove loose dust. Brush with the fin direction—never across—to avoid bending fins. If fins are bent, a fin comb can straighten them, improving airflow.
5) Apply coil cleaner. Lightly spray a non-acid foaming coil cleaner or mild detergent solution onto the coil face. Cover the surface, but don’t drench electronics. Allow dwell time per the label (typically 5–10 minutes). The foam lifts grime so it drains into the pan. Often, no-rinse cleaner is enough because condensate carries it away; for a very dirty coil, mist with clean water to aid rinsing, directing water toward the pan.
6) Clean the blower wheel (fan barrel). If the cylindrical blower is visible, use a soft brush and vacuum to loosen and remove buildup from the vanes. Heavy buildup? Apply a small amount of cleaner to a cloth or brush and wipe each section while rotating the wheel by hand. Avoid heavy spraying that might drip into the motor.
7) Clear the drain pan and drain line. Wipe the pan clean. Check the drain outlet—standing water suggests a clog. Head to the outside drain termination and use a wet/dry vacuum for 1–2 minutes to pull debris. Alternatively, flush from the indoor side with warm water or white vinegar. Confirm a steady flow.
8) Wipe plastics and sensors. Clean the louvers, front panel, and accessible sensors with a slightly damp microfiber cloth. Skip solvent cleaners. Ensure the IR receiver and temperature sensor remain clean and dry.
9) Dry and reassemble. Let surfaces air-dry for 10–15 minutes. Reinstall dry filters. Close the panel.
10) Test. Restore power at the breaker. Run Cooling mode at a low setpoint for 10–15 minutes. Look for steady condensate drain, stronger airflow, fewer odors, and even temperatures. Listen for smooth fan operation.
Typically, these steps take 45–90 minutes on a wall unit. If odors persist or you encounter sticky buildup that won’t lift, pause and consider a professional deep clean (often involves removing the blower wheel and thorough coil washing). A careful DIY clean usually restores lost performance, prevents drain leaks, and makes the space feel fresher right away.
Maintenance Schedule, Costs, and When to Call a Pro
Frequency depends on environment and usage. As a baseline, check filters monthly during hot seasons and wash or replace when visibly dusty. Clean the coil, blower, and drain at least once before peak season and once after, especially in humid climates. Pets, smoking, construction dust, or heavy traffic nearby? Increase the frequency. DIY costs stay low: a bottle of coil cleaner, microfiber cloths, and a basic brush kit typically cost less than a single service visit. Add a wet/dry vacuum and you can keep drain lines clear for years.
Know when to stop and call a pro: ice forming on the evaporator or refrigerant lines after cleaning and restoring normal airflow; unusual electrical smells or repeated breaker trips; new, loud mechanical noises; persistent leaks even after the drain is cleared; or weak cooling despite a clean coil and proper fan operation. Such signs can point to low refrigerant, a failing blower motor, a misaligned fan wheel, or control board issues—problems that need tools and diagnostics you likely don’t have at home.
A professional maintenance visit typically includes deeper blower cleaning, coil washing with specialized cleaners or low-pressure rinsing, electrical checks, temperature and pressure measurements, drain clearing, and a general system inspection. Prices vary by region, and annual service can be worthwhile if your system runs hard. If your system is under warranty, confirm which DIY tasks are allowed. Most manufacturers encourage filter maintenance and gentle surface cleaning but may limit chemical use or disassembly beyond covers. Your safest bet is to follow the manual and document your work.
To keep costs predictable, create a seasonal checklist and set calendar reminders. Record filter changes and cleaning dates on your phone. If something feels off—smells return quickly, airflow dips within weeks, or water spots appear near the unit—do a quick drain check and filter inspection right away. Early action keeps small issues from becoming expensive failures.
Common Mistakes and Myths to Avoid
Mistake: using bleach or harsh chemicals on the evaporator coil. Bleach attacks aluminum and coil coatings, shortening equipment life. Choose non-acid coil cleaners or mild detergent solutions instead. Mistake: pressure-washing the indoor coil. High pressure bends fins and leads to repairs. Keep it gentle with soft brushing and low-pressure rinsing. Mistake: leaving the power on. A fan might start unexpectedly or moisture could short a board. Always shut off power at the breaker.
Mistake: over-spraying near electronics. Many wall units have a control board tucked behind a small cover; keep liquids away and direct spray at the coil face. Mistake: reinstalling damp filters. Moist filters invite odor and microbial growth—let them dry fully. Mistake: ignoring the drain line. Even a clean coil drips into the pan; if the line clogs, you’ll get leaks and odors. Add a quick drain vacuum or flush to every cleaning.
Myth: strong fragrances mean clean. Fragrance masks odors but doesn’t remove the cause. A clean coil and clear drain remove the smell because they remove the source. Myth: higher MERV always equals better. On systems not designed for high-resistance filters, airflow can drop, hurting efficiency and risking icing. Follow the manufacturer’s filter guidance. Myth: “Set it colder to clean it.” Dropping the setpoint doesn’t clean a coil; it can increase condensation and, with restricted airflow, may ice the coil.
A few more pitfalls: mixing cleaners can create harmful reactions—use one product at a time. Skipping protective gear makes the job unpleasant and risky. Forgetting to check for bent fins reduces the payoff from your cleaning work. And finally, not reading the model-specific manual is the fastest route to broken clips or covers. With a light touch, patient brushing, and careful control of where liquids go, you’ll avoid these traps and get professional-grade results safely.
Quick Q&A: Fast Answers to Common AC Indoor Unit Cleaning Questions
Q1: How often should I clean my AC indoor unit? A: Check and clean filters monthly during heavy use. Plan a deeper clean of the coil, blower, and drain at least once before and once after the cooling season. In dusty or humid environments—or if you have pets—add one or two extra cleanings.
Q2: What is the easiest way to clear a clogged drain line? A: Use a wet/dry vacuum at the outside drain termination for 1–2 minutes to pull out sludge. If you can’t access it outside, slowly pour warm water or white vinegar into the indoor drain pan outlet and confirm flow. Some systems include a cleanout port—check your manual.
Q3: Which cleaner is safe for the evaporator coil? A: Choose a non-acid, non-caustic foaming coil cleaner labeled for indoor evaporators. Mild dish detergent in warm water also works for light soil. Avoid bleach and strong solvents—both can corrode metals and degrade plastics and coatings.
Q4: Can I damage the coil by brushing? A: Yes, if you brush across the fins or use stiff tools. Always brush with the grain using a soft brush and light pressure. If fins are bent, use a fin comb gently to straighten them. The aim is to lift dust, not scour.
Q5: When should I call a professional instead of DIY? A: Call a pro if ice returns after cleaning with good airflow, leaks persist despite a clear drain, burning smells appear, breakers trip repeatedly, or cooling remains weak with clean components. Also call if your unit is under warranty and the manual limits DIY chemical use or disassembly.
Conclusion: Your Next 90 Minutes Could Save a Season of Headaches
Quick recap: a dirty AC indoor unit quietly steals comfort, money, and air quality. With simple tools, safe cleaners, and a focused plan, you can clean filters, the evaporator coil, the blower wheel, and the drain path to restore airflow and efficiency. You’ve seen why buildup happens, which tools to use, the exact steps to avoid damage, and the common mistakes to skip. You also know when DIY is enough and when to bring in a pro.
Take action now. Block 60–90 minutes this week. Gather a non-acid coil cleaner, a soft brush, microfiber cloths, a spray bottle, and a wet/dry vacuum if you have one. Power down the system, clean the filters, brush and foam the coil, clear the drain, wipe the plastics, and test. Then set a reminder to do a quick filter check every month during peak season. Prefer expert backup? Schedule a professional maintenance visit before the hottest months—your system will thank you when the heat hits.
If you live with roommates or family, share this guide and teach one person the process—it’s a skill that pays you back every summer. Keep your manufacturer’s manual handy, be gentle with the fins, and stick to safe cleaners. Your reward: faster cool-downs, fresher air, fewer leaks, and lower energy bills. Ready to breathe easier and pay less for comfort? Start your first clean today—and tell someone you care about how simple it can be. What part of your AC indoor unit will you clean first: the filters, the coil, or the drain line?
Helpful Resources and Outbound Links:
– U.S. Department of Energy – Air Conditioning Tips: https://www.energy.gov/energysaver/central-air-conditioning
– EPA Safer Choice (find safer cleaning products): https://www.epa.gov/saferchoice
– ASHRAE (indoor air quality and HVAC guidance): https://www.ashrae.org/technical-resources/standards-and-guidelines
– WHO – Household Air Pollution overview: https://www.who.int/health-topics/air-pollution#tab=tab_1
– Example manufacturer support (check your unit’s manual): Daikin https://www.daikin.com/support, Mitsubishi Electric https://www.mitsubishicomfort.com/support
Sources:
– U.S. Department of Energy. “Cooling Tips.” Energy Saver. Accessed 2025. https://www.energy.gov/energysaver/central-air-conditioning
– U.S. Environmental Protection Agency. “Safer Choice Standard.” Accessed 2025. https://www.epa.gov/saferchoice
– ASHRAE. “Standards and Guidelines.” Accessed 2025. https://www.ashrae.org/technical-resources/standards-and-guidelines
– WHO. “Air Pollution.” Accessed 2025. https://www.who.int/health-topics/air-pollution