Sky-high energy bills, limp cooling, and a chattering outdoor fan often point to the same culprit: a dirty condenser—the outside half of your air conditioner. As dust, pollen, leaves, and grime plug the fins and coil, the system is forced to work harder, burning electricity and shaving years off its life. In this DIY guide, you’ll learn, step by step, how to safely clean the outdoor unit. It’s a straightforward, budget-friendly job you can finish in an afternoon, even if HVAC maintenance is new to you. Keep reading to protect comfort, trim costs, and head off preventable breakdowns.
Why Your Outdoor Unit Gets Dirty—and Why It Matters
Out in the weather 24/7, the condenser naturally becomes a magnet for dust, grass clippings, cottonwood fluff, pet hair, and urban pollution. Those thin metal fins are engineered to shed heat fast; once clogged, airflow slows, the refrigerant can’t cool as intended, and the compressor ends up running longer than it should. Over time, the extra effort shows up as higher bills, uneven cooling, and stress on pricey parts.
How big is the hit? The U.S. Department of Energy reports that routine maintenance improves performance and saves energy; even clean filters alone can trim consumption by 5–15% compared with clogged ones. What’s interesting too, coil fouling—dirt on heat-transfer surfaces—has been shown in ASHRAE research to reduce capacity and raise operating temperatures, especially in dusty or polluted areas. A thin film of grime may look harmless, yet across a hot season it can translate into hours of extra runtime.
Watch for warning signs: the top of the unit feels hotter than usual, cooling cycles stretch out, indoor temps drift, or your energy bill jumps month over month despite similar weather. On closer look, you might spot matted debris on fins, bent sections that choke airflow, or a fan shrouded in dust. If the system is relatively new but already seems tired, the outdoor unit often sits at the center of the problem.
By cleaning the condenser, designed airflow is restored and pressures and temperatures land back where they belong. Noise drops, comfort improves on peak days, and the compressor and fan motor can last longer. The routine is simple: power down, clear debris, rinse, apply coil cleaner, rinse again, straighten fins, and reassemble. Do it once or twice a year—ideally before summer and after heavy pollen—and, after restarting, smoother performance is usually noticeable within minutes.
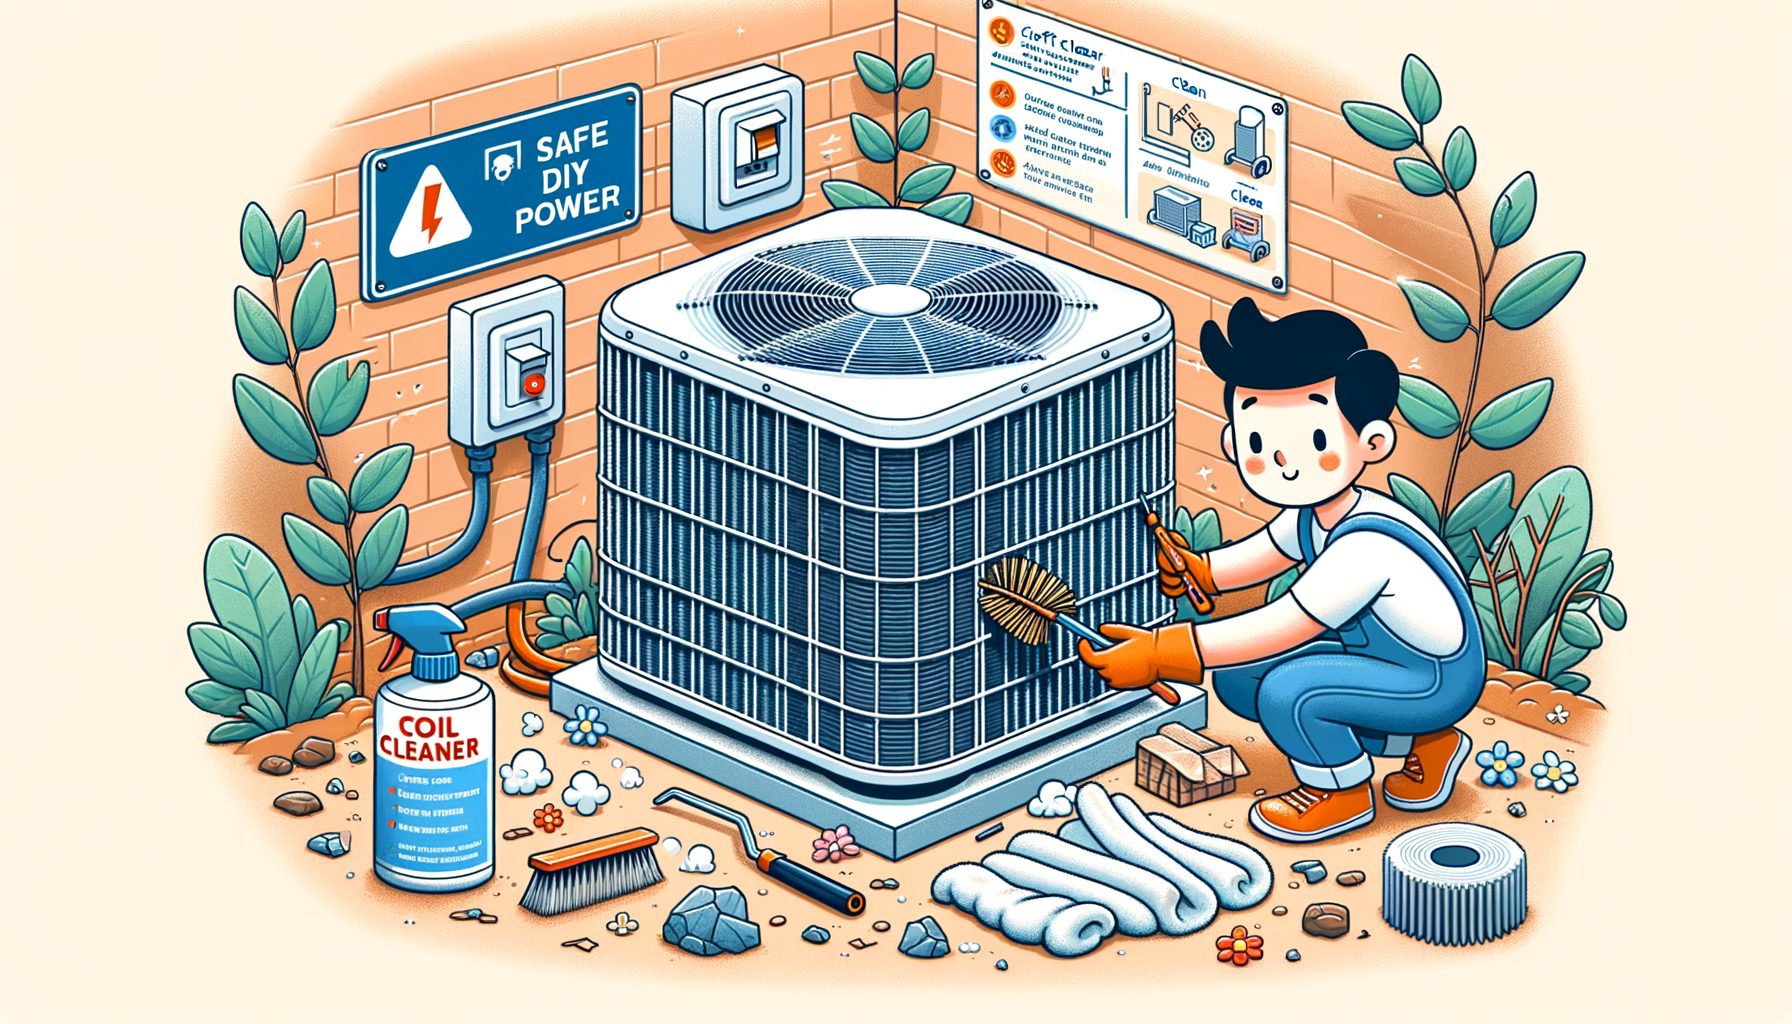
Safety First: Tools, Prep, and Simple Safeguards
Before touching the outdoor unit, start with safety. You’ll be using water near electrical components, so take a few basic steps to protect yourself and the equipment.
Power off completely. Locate the outdoor disconnect box next to the condenser and pull the disconnect or switch it to “OFF.” Also turn off the corresponding breaker in the electrical panel. Doing both prevents accidental starts and reduces shock risk. Wait a minute to let any delay timers expire and confirm the fan won’t start.
Gather the right tools. No specialty gear is required for a safe, thorough job:
– Garden hose with a regular spray nozzle (avoid pressure washers).
– Non-acid, non-alkaline foaming coil cleaner rated for outdoor condenser coils.
– Soft brush or fin comb for straightening bent fins.
– Nut driver or screwdriver (to remove the top fan assembly if needed and safe to do so).
– Work gloves, safety glasses, and an optional dust mask.
– Plastic bags and tape to cover electrical components if you open the unit.
– A small level and shims (to correct minor pad leveling issues).
Protect electronics. If you remove the fan top or open service panels, loosely cover exposed electricals with plastic and tape. Avoid drenching control boards or capacitor areas. If panel removal feels uncertain, keep the cleaning external and skip disassembly.
Choose the right cleaner. Select a coil cleaner designed for aluminum fins and copper tubing. Skip bleach, oven cleaner, degreasers, and strong household acids—they corrode metals and damage paint, fins, and nearby plants. Many modern coil cleaners are self-rinsing and biodegradable; follow the label for dilution and dwell time.
Mind warranties and local rules. Some manufacturers require maintenance yet limit DIY actions involving refrigerant circuits or electrical repairs. You won’t be touching refrigerant during this cleaning; however, if you suspect leaks, low charge, or electrical issues, stop and call a licensed pro. In the U.S., EPA Section 608 governs refrigerant handling—don’t connect gauges or add refrigerant unless certified.
Pick the right day. Aim for mild, dry weather. Midday sun can make cleaners dry too quickly and leave residue, so early morning or late afternoon is ideal. Clear the area around the unit to give yourself at least 2 feet of workspace, and bring pets indoors.
Time and cost checklist:
– Time: 60–120 minutes for most homes.
– Cost: $10–$30 for cleaner, $5–$20 for a fin comb (optional).
– Difficulty: Easy to moderate, depending on how dirty and accessible your unit is.
Step-by-Step: How to Clean the Condenser Like a Pro
Follow the sequence below for a safe, thorough clean that brings back airflow and efficiency.
Step 1: Shut off power. Pull the outdoor disconnect and flip the indoor breaker for the condenser circuit. Wait a full minute for any delay timers to finish.
Step 2: Remove leaves and loose debris. Put on gloves and gently clear leaves, twigs, and dirt from the base and around the sides. Keep a 2–3 foot clearance radius by trimming shrubs and pulling weeds.
Step 3: Pre-rinse outside-in. With a standard garden hose and normal spray, rinse the exterior fins to knock off surface dust. Keep the spray gentle and perpendicular to the fins to avoid bending them. Steer clear of electrical boxes and the top motor housing.
Step 4: Access interior if needed. When debris is heavily matted inside, consider removing the top fan assembly. Support the fan so no wires are strained. Cover the motor and any visible electronics with plastic to keep them dry. Not comfortable with this step? Continue with external cleaning only.
Step 5: Apply coil cleaner. Coat the fins evenly from bottom to top so foam lifts dirt outward. Respect the product’s dwell time—usually 5–10 minutes. Don’t let it dry; re-wet if needed.
Step 6: Rinse from inside out. For best results, rinse from the inside of the coil outward to push loosened debris back the way it came in. Keep water pressure low to moderate. Never use a pressure washer; fins can be flattened and water forced into places it shouldn’t go.
Step 7: Straighten bent fins. Using a fin comb or a gentle brush, realign flattened sections. Restoring fin spacing improves airflow and heat rejection. Work slowly to avoid tearing.
Step 8: Clean the fan blades and top cover. Wipe dust off the fan blades with a damp cloth; avoid bending them. Check for wobble or cracks. Keep the motor housing dry.
Step 9: Check the pad and level. A tilting condenser can stress piping and bearings. Use a small level and add composite shims under pad corners if tilt is noticeable. Lift refrigerant lines only slightly; small adjustments are enough.
Step 10: Reassemble and dry. Remove plastic coverings, reinstall the fan assembly, and secure all panels. Allow 10–15 minutes for natural drip-drying.
Step 11: Restore power and test. Turn on the breaker and push in the outdoor disconnect. Set the thermostat to cool and observe. The fan should start smoothly; warm air should blow out the top (heat being rejected), and indoor supply air should cool within a few minutes. Listen for unusual noises and check for vibration.
Pro tip: Pair the job with an indoor filter change. A clogged return filter can sabotage your outdoor work by restricting airflow on the indoor coil, undoing efficiency gains. Regular filter changes are one of the highest-ROI maintenance moves you can make.
Well, here it is: a quick-reference table to plan your work.
| Task | Typical Time | Cost Range (USD) | Impact |
|---|---|---|---|
| Power down and prep area | 10–15 min | $0 | Safety and easy access |
| Rinse and coil cleaning | 30–60 min | $10–$30 | Restores airflow and heat rejection |
| Straighten fins (as needed) | 10–30 min | $5–$20 (fin comb) | Improves efficiency and lowers noise |
| Pad leveling (minor) | 10–20 min | $0–$10 (shims) | Reduces vibration and stress |
Common Mistakes to Avoid—and When to Call a Professional
Even simple tasks can go sideways without a few guardrails. Steer clear of these pitfalls to keep your condenser safe and effective.
Skip pressure washers. High-pressure jets flatten delicate fins, drive water into bearings and electrical parts, and can force dirt deeper into the coil. A standard garden hose is plenty. If stubborn sludge hangs on, use the right coil cleaner and patience—not force.
Avoid harsh household chemicals. Strong bleach, concentrated vinegar, oven cleaners, and degreasers can corrode aluminum and copper. They may also discolor paint and harm landscaping. Stick with coil cleaners made for condensers and follow label directions.
Keep electronics dry. Don’t soak control boards, capacitors, or wiring. If you open the unit, cover electronics with plastic and use a gentle spray angle. If a board gets wet, allow ample drying time and inspect for residue before powering on.
Handle fins gently. They’re razor-thin and easy to deform. Use a proper fin comb with a light touch. Bent fins reduce airflow and can whistle or buzz.
Don’t ignore the filter. Cleaning the outdoor coil while leaving a clogged indoor filter in place is like washing one lens of your sunglasses—the system remains constrained. Replace or clean filters on schedule (usually every 1–3 months during heavy use).
Mind pets and plants. Rinse overspray away from garden beds, and keep pets inside so they don’t ingest foam. Many cleaners are biodegradable, yet they can still irritate skin and eyes.
Know when to call a pro. Some issues aren’t solved by cleaning:
– Low cooling with ice on lines or the indoor coil suggests airflow problems or refrigerant issues.
– Short-cycling, tripped breakers, or a humming unit that won’t start can indicate electrical or capacitor faults.
– Oily residue on refrigerant tubing or at joints points to a leak.
– Severely matted coils inside tight cabinets may require coil removal for thorough cleaning—a technician’s job.
Then this: annual professional maintenance complements your DIY work. A technician can check refrigerant charge, superheat/subcooling, amp draws, contactors, capacitors, and thermostat calibration. A deeper diagnostic visit—often done preseason—catches small problems before they become expensive outages on the hottest day of the year.
Document what you did. Snap before-and-after photos and note the date, weather, and products used. If performance changes—quieter fan, faster cool-down, lower energy bill next month—your notes will confirm the benefits and guide how often to repeat the process.
FAQs
How often should I clean my outdoor AC unit? In most climates, once a year before peak summer is enough. In dusty areas, near construction, or during heavy pollen, aim for twice a year.
Is it safe to hose down my AC unit? Yes—use a gentle garden hose. Avoid pressure washers and don’t spray directly into electrical compartments. Always shut off power first.
Which cleaner should I use? Choose a non-acid, non-caustic coil cleaner designed for aluminum condenser coils. Follow the label for dilution and dwell time.
Will cleaning fix low refrigerant or electrical problems? No. Cleaning restores airflow but won’t correct charge, leaks, or faulty components. Call a licensed HVAC technician for those issues.
Conclusion
Keeping the outdoor unit clean is one of the easiest ways to reclaim comfort, reduce energy use, and extend system life. You’ve seen why the condenser gets dirty, how grime throttles airflow and efficiency, and how to act safely with everyday tools: power down, clear debris, rinse, apply coil cleaner, rinse again, straighten fins, and reassemble. You also learned which pitfalls to avoid—no pressure washers, no harsh chemicals, and no soaking electronics—and how to spot red flags that warrant professional help. Taken together, these steps bring performance closer to factory spec, often in under two hours and for the cost of a bottle of cleaner.
If you’ve been battling rising bills, longer cooling cycles, or uneven temperatures, make this your weekend win. Gather your tools, pick a mild day, and give the outdoor unit the attention it deserves. Afterward, pair the work with a fresh indoor filter and a quick thermostat test. In many homes, the payoff is immediate: steadier cooling, a quieter fan, and less strain on the compressor. Your future self—during the next heat wave—will be grateful.
Ready to start? Bookmark the guide, grab a proper coil cleaner, and set a reminder to repeat the process once or twice a year. If you notice issues beyond dirt—icing lines, electrical trips, suspected leaks—contact a certified HVAC technician to keep the system safe and efficient. Small actions add up; a clean condenser today can help you avoid big repair bills tomorrow.
Comfort isn’t a luxury—it’s a habit. Take the first step now and picture how good that cool, even airflow will feel tonight. Then ask yourself: what small maintenance win comes next?
Helpful resources:
– U.S. Department of Energy: Central Air Conditioning Basics and Maintenance — energy.gov/energysaver/central-air-conditioning
– ENERGY STAR: Cooling Tips and Maintenance — energystar.gov/products/heating_cooling/air_conditioning
– ASHRAE (Industry Research on Coil Fouling and Efficiency) — ashrae.org
– EPA Section 608 (Refrigerant Handling Rules, U.S.) — epa.gov/section608
Sources:
– U.S. Department of Energy, Energy Saver: Central Air Conditioning
– ENERGY STAR: Air Conditioning Tips and Maintenance
– ASHRAE publications on coil fouling and HVAC performance